
A quality Tarp is an investment. Whether you use it to protect equipment, construction materials, vehicles, firewood, outdoor furniture, machinery, sports fields, or valuable supplies, proper Tarp Care can greatly extend its life and improve its performance.
Good Tarp Care begins long before installation. It starts with choosing the right Tarp for your specific application. From there, proper installation, regular inspections, timely repairs, routine cleaning, and correct storage all help keep your Tarp working for years to come.
Whether you own Poly Tarps, Vinyl Tarps, Canvas Tarps, Mesh Tarps, or specialty Tarps, following a few simple maintenance practices can reduce unnecessary replacement costs and help your Tarp perform at its best.
Good Tarp Care Begins with Choosing the Right Tarp
The easiest way to extend the life of a Tarp is to select one that is designed for the job. Different materials are made for different environments, weather conditions, and levels of use.
Common Tarp materials include:
- Poly Tarps: Lightweight, waterproof, affordable, and useful for everyday outdoor protection.
- Vinyl Tarps: Strong, waterproof, and well suited for heavy-duty commercial, trucking, industrial, and construction uses.
- Canvas Tarps: Breathable and durable, making them useful for protecting equipment and supplies where airflow is important.
- Mesh Tarps: Allow airflow while providing shade, wind reduction, privacy, and debris control.
- Fire Retardant Tarps: Designed for applications where flame resistance or compliance with safety requirements is important.
Material type is only one part of the decision. You should also consider the weight, thickness, size, waterproof performance, UV resistance, weather exposure, and expected length of use.
A Tarp that is too light for a demanding job may wear out quickly. A Tarp that is too small may be stretched beyond its limits. Choosing the correct material and size helps reduce stress and makes maintenance easier from the beginning.
Install the Tarp Properly
Even a strong Tarp can wear out early if it is installed incorrectly. A loose Tarp may flap in the wind, rub against rough surfaces, collect water, or one that is put up too tightly can place too much pressure on the material or effect individual grommets.
A secure installation reduces movement and helps distribute tension across the entire Tarp.
Use these basic installation tips:
- Choose the correct tie-downs, ropes, straps, or bungee cords.
- Secure the corners and edge grommets and use all the grommets around the perimeter if possible.
- Distribute tension evenly around the perimeter.
- Reduce loose areas that may flap in strong winds.
- Protect the material from sharp corners and rough edges.
- Use padding where the Tarp touches abrasive surfaces.
- Allow rainwater and melting snow to drain away.
- Avoid pulling too tightly from only one grommet or attachment point.
Do not use grommets as the only support for a heavy load. Grommets are intended as attachment points. Excessive pulling can cause the material around them to stretch or tear.
When covering equipment, lumber, machinery, or other uneven objects, check for protruding corners before securing the Tarp. A piece of foam, folded cloth, cardboard, or another protective barrier can help prevent punctures and abrasion.
Inspect Your Tarps on a Regular Basis
Routine inspections are one of the easiest ways to prevent larger and more expensive damage. A small tear may be repaired in minutes. If it is left untreated, wind and movement can turn it into a much larger opening.
Inspect Tarps before installation, during long periods of use, and again before cleaning or storage.
Look for the following signs of wear:
- Small cuts, holes, or punctures
- Loose or separated seams
- Missing, bent, or damaged grommets
- Frayed hems or worn edges
- Abrasion caused by rubbing
- Loose ropes, straps, or tie-downs
- Water pooling in low areas
- Fading, brittleness, or cracking
- Dirt, mold, mildew, or chemical buildup
Pay special attention after storms, high winds, heavy rain, or snowfall. Weather can loosen attachments, shift the covered object, and create new pressure points.
Regular inspections also improve safety. A damaged Tarp may come loose, expose valuable materials, allow moisture to enter, or create a tripping and handling hazard.
Make Small Tarp Repairs Quickly
Many common types of Tarp damage can be repaired without replacing the entire cover. The best repair method depends on the Tarp material, the location of the damage, and the size of the problem.
Typical repairs include:
- Small tears and cuts
- Minor punctures
- Worn spots caused by rubbing
- Loose or leaking seams
- Torn hems
- Missing or damaged grommets
Before making any repair, clean and dry the damaged area. Dirt, grease, moisture, and loose material can prevent tape, glue, cement, or sealant from bonding correctly.
Tarp Repair Tape
Tarp Repair Tape is one of the fastest ways to handle small tears, punctures, and cuts. It is useful for quick repairs in the field and for preventing minor damage from spreading.
Smooth the damaged area before applying the tape. Round the corners of the repair tape when possible, since sharp corners may lift more easily. Press the tape firmly into place and remove air bubbles.
For added strength, apply repair tape to both sides of the Tarp when the damaged area is accessible.
Tarp Glue and Tarp Cement
Tarp Glue and Tarp Cement can create a stronger and more permanent repair. These products are often used to reinforce damaged sections, bond compatible, and attach patches of Tarp materials.
A patch should extend beyond the damaged area on every side. Follow the product instructions for surface preparation, application, drying time, and curing time.
Make sure the glue or cement is suitable for the specific material. Products made for Vinyl Tarps may not be appropriate for Poly Tarps, Canvas Tarps, or other fabrics.
Seam Sealer
Seams often receive repeated stress during use. Over time, stitching may loosen or moisture may begin to pass through a worn seam. In addition, not all thread is waterproof.
Seam Sealer can help reinforce stitched areas and restore water resistance. It is especially useful for Tarps that remain outdoors during rain, snow, and changing temperatures.
Apply Seam Sealer only to a clean, dry surface. Allow it to cure fully before folding the Tarp or exposing it to moisture.
Grommet Kits
A missing or damaged grommet does not usually mean that the entire Tarp must be replaced. A Grommet Kit can be used to install a new attachment point or replace a worn or missing grommet.
Install the new grommet in a strong section of material. If the surrounding fabric is torn or stretched, reinforce it with a patch before adding the replacement grommet.
A new grommet should not be installed too close to the edge or directly through a weak area. Proper positioning helps spread the load and reduces the chance of another tear.
Easy Tarp Cleaning Tips
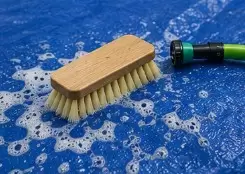
Cleaning helps preserve the appearance and performance of a Tarp. Dirt, road salt, bird droppings, tree sap, grease, mold, mildew, and chemical residue can damage coatings and weaken material over time.
For basic cleaning:
- Spread the Tarp on a clean surface.
- Brush or sweep away loose dirt and debris.
- Rinse the surface with clean water.
- Wash with mild soap (or Tarp Cleaner) and warm water.
- Use a soft brush, cloth, or sponge.
- Rinse thoroughly to remove soap residue.
- Allow the Tarp to dry completely.
Avoid harsh solvents, bleach, abrasive brushes, pressure washing, or strong chemicals. These products may remove protective coatings, weaken fibers, or change the color of the material.
Do not place a wet Tarp into storage. Moisture trapped between folded layers can lead to mold, mildew, staining, and unpleasant odors.
Tarp Cleaner
A specialized Tarp Cleaner is available for users who need additional cleaning power. These products are designed to remove dirt, grease, road grime, mold, mildew, and stains with formulas that are safe for the Tarp material.
Always test the cleaner on a small, less visible area first. Follow the product directions and rinse the surface thoroughly after cleaning.
Tarp Protectant
Tarp Protectant may be applied to help preserve flexibility, improve appearance, and provide added protection from sunlight, moisture, and outdoor exposure.
A protectant can be especially helpful for Vinyl Tarps and other materials that spend long periods outdoors. Use only a product that is compatible with the Tarp material.
Six Basic Tarp Storage Tips
Proper storage is an important part of Tarp maintenance. Even a clean and repaired Tarp may develop damage if it is stored in a wet, hot, dirty, or poorly ventilated location.
Follow these six basic storage initiatives to help extend the service life of your Tarps.
1. Clean and Dry
Clean the Tarp before storing it and make sure it is completely dry. Moisture trapped inside folded material can lead to mold, mildew, stains, odors, and material breakdown.
2. Folding or Rolling
Fold the Tarp neatly or roll it when practical. Large or heavy Tarps are often easier to handle when rolled.
Avoid stuffing the Tarp into a small container. This may create sharp creases, place stress on seams, and bend or damage the grommets.
3. Store in a Dry Atmosphere
Choose a cool, dry, and well-ventilated storage area. Garages, sheds, warehouses, storage rooms, and covered racks may work well when they are protected from leaks and excessive humidity.
4. Avoid Direct Sunlight and High Heat
Long-term exposure to direct sunlight can weaken many Tarp materials. Excessive heat may also cause coatings to soften, dry out, crack, or stick together.
Store Tarps away from windows, heaters, furnaces, hot machinery, and other strong heat sources.
5. Avoid Contaminants
Keep stored Tarps away from gasoline, oil, solvents, paint, fertilizers, cleaning chemicals, sharp tools, and other contaminants.
Chemical spills can weaken the material or damage waterproof and protective coatings. Sharp items may create cuts or punctures while the Tarp is being moved.
6. Elevate Above the Ground
Store Tarps on shelves, pallets, racks, or another raised surface. Keeping them above the ground helps protect against standing water, damp concrete, dirt, insects, and rodents.
Elevation also improves airflow around the stored Tarp and makes it easier to inspect and retrieve when needed.
Keep Basic Tarp Repair and Maintenance Supplies Available
Keeping a small group of repair and maintenance products nearby makes it easier to address damage as soon as it appears.
Useful supplies may include:
- Tarp Repair Tape
- Tarp Glue
- Tarp Cement
- Seam Sealer
- Grommet Kits
- Replacement tie-downs and straps
- Mild soap and soft cleaning brushes
- Tarp Cleaner
- Tarp Protectant
- Matching material for patches
Store these products according to the manufacturers' directions. Keep repair adhesives, cleaners, and protectants properly sealed and away from extreme temperatures.
A Little Tarp Maintenance Goes a Long Way
Tarps are built to protect valuable equipment, supplies, vehicles, materials, work areas, and outdoor spaces. Even the toughest Tarp, however, benefits from regular care.
Start by choosing the right Tarp for the application. Install it securely, reduce flapping and abrasion, and inspect it regularly. Repair small problems before they spread. Clean the material with suitable products and allow it to dry completely before storage.
When storing a Tarp, remember the six basic steps: clean and dry it, fold or roll it carefully, keep it in a dry atmosphere, avoid direct sunlight and high heat, protect it from contaminants, and elevate it above the ground.
Keeping Tarp Repair Tape, Tarp Glue or Tarp Cement, Seam Sealer, Grommet Kits, Tarp Cleaner, and Tarp Protectant available can also make routine maintenance faster and easier.
With the right use, regular inspections, timely repairs, simple cleaning,
and proper storage, your Tarps can continue providing dependable
protection for many years.
If you have questions or need assistance with any of our products, please contact Tarps Now at (888) 800-1383 or sales@tarpsnow.com where a knowledgeable and helpful team member located at the Michigan headquarters looks forward to speaking with you.
